

Potted Plants Without Drainage Holes: Your Guide to Checking Moisture & Preventing Root Rot
4/8/25
.jpeg)
Good drainage is the unsung hero for protection root rot. What if your favorite pot, the one that perfectly matches your decor, lacks those crucial drainage holes? It can be a challenging task for new home garden owners to identify insufficient drainage during garden servicing. Do not despair! This article will guide you through the essential steps of checking the drainage of potted plants that do not have drainage holes during garden maintenance, ensuring your green friends remain healthy and vibrant.
The dangers of Poor Drainage: Root Rot
Before we dive into the essential techniques. Let us quickly reiterate why drainage is so critical. Without drainage holes, excess water has nowhere to go. It sits at the bottom of the pot, creating a waterlogged environment that deprives roots of oxygen. This suffocating condition quickly leads to root rot, a fungal disease that can weaken your plant in a matter of days. Symptoms include yellowing leaves, wilting, stunted growth, and a soft, mushy stem base.

Plant with yellow leaves due to root rot
The consequence of overwatering
One of the most common and detrimental mistakes in plant care: overwatering. While it might seem counterintuitive that too much of a good thing can be harmful, overwatering is a silent killer, leading to a series of problems that is fatal to the plant.
-
No Escape for Excess Water: There's nowhere for the extra water to go. It sits at the bottom of the pot, saturating the entire soil volume.
-
Drowning Roots: These vital air pockets become completely filled with water, effectively "drowning" the roots. The roots are starved of oxygen.
-
Root Rot Begins: Without oxygen, root cells begin to die and decompose. This is the onset of root rot, a devastating and often fatal plant disease.
The dangers of Poor Drainage: Fungi gnat


A pot without drainage holes prevents excess water from escaping. This leads to:
-
Saturated Soil: The soil remains constantly wet, creating an ideal habitat for fungus, algae, and decaying organic matter – the primary food source for fungi gnat larvae.
-
Lack of Oxygen: Waterlogged soil deprives plant roots of essential oxygen, leading to root suffocation and eventually, root rot. This decaying root material further fuels the gnat population.
-
Stagnant Environment: Without proper water flow, the pot becomes a stagnant ecosystem, where the larvae of fungi gnat thrives
While the adult fungi gnats are mostly a nuisance, it's their larvae that pose the significant threat to your plants.
Root Damage and Disease: Fungi gnat larvae feed on fungi and decaying organic matter in the soil. However, when these food sources are scarce (as they can become in an established root system), the larvae will turn to tender, young roots. This damage creates entry points for various fungal and bacterial diseases, which are already rampant in the overly wet conditions of an undrained pot. The most common and devastating of these is root rot, a silent killer that can quickly lead to the demise of your plant.
Fungi gnats on sticky tape(circled)
Fungi gnats larvae
During plant maintenance, checking drainage in a pot without holes is not about seeing water leaking from the base of the pot as it will not happen for some pots(it depends on the soil as well). Instead, it's about understanding the moisture levels within the pot and preventing overwatering in the first place.
Checking Drainage in Pots Without Holes
A pot with no drainage holes
1. The "Lift Test" - Your Primary Indicator:
This is arguably the most straightforward and effective method.
-
Before Watering: Lift the pot. Get a feel for its weight. A dry pot will feel significantly lighter than a watered one.
-
After Watering: Water your plant thoroughly (but carefully, see point 2). Wait a few minutes for the water to settle, then lift the pot again.
-
Ongoing Monitoring: As the days pass, periodically lift the pot. You'll notice it gradually becoming lighter as the plant uses water and evaporation occurs. Water only when the pot feels noticeably lighter. This indicates that most of the water has been utilized or evaporated, reducing the risk of waterlogging.
2. The "Finger Test" - Your Tactile Gauge:
While less effective for deep drainage, the finger test helps assess the moisture level of the top few inches of soil.
-
Insert your index finger about 2-3 inches into the soil.
-
If it feels dry, it's likely time to water.
-
If it feels damp, wait a few more days and re-check.
Important Note: The finger test primarily assesses the top layer. In a pot without drainage, the bottom could still be waterlogged even if the top feels dry. This is why the "Lift Test" is superior for these specific pots.
3. The moisture indicator Test - A Deeper Dive:
For a very accurate assessment of deeper moisture, use a moisture indicator
-
Insert the indicator all the way to the bottom of the pot.
-
Leave it for about 1 minute.
-
Observe the reading

measuring moisture with a mositure indicator
4. Observing Your Plant's Cues during plant maintenance:
Your plant is an excellent communicator. Learn to read its signals:
-
Wilting/Drooping: This can indicate both underwatering and overwatering. However, if the soil feels damp, it's more likely overwatering.
-
Yellowing Leaves (especially lower leaves): Often a sign of overwatering and potential root rot.
-
Stunted Growth: Can be a general sign of stress, including poor drainage.
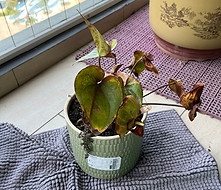
a yellowing plant with root rot
Remedy for soil that is too wet
5. Implementing a Layer of Drainage (Pre-emptive Measure):
While not a "check" in itself, creating a false bottom before planting can significantly mitigate drainage issues.
-
False Bottom Layer: Add a layer of pebbles, gravel, or even broken terracotta pieces (about 1-2 inches) at the bottom of the pot before adding soil. This creates a reservoir for excess water, keeping the roots out of standing water.
-
Landscape Fabric/Mesh: Place a piece of landscape fabric or mesh over the drainage layer before adding soil to prevent the soil from mixing with the pebbles.
6.If there are no holes, use a drill to drain a hole
7. Mindful Watering:
This is the most crucial aspect of caring for plants in pots without drainage holes.
-
Water Less Frequently: Err on the side of underwatering rather than overwatering. It's easier to revive an underwatered plant than one with root rot.
-
Water in Small Increments: Instead of a large deluge, water in smaller amounts, allowing the plant to absorb what it needs.
-
Avoid a Watering Schedule: Don't water purely based on a calendar. Water based on the plant's needs and the moisture level in the pot as determined by your checks.
-
Use a moisture meter to check the moisture level before watering if you are uncertain
Worried about the silent killer lurking in your beautiful pots? Even with the best intentions, figuring out drainage in pots without holes can be tricky. Don't let root rot claim your precious plants!
Hire a professional gardener today. We'll accurately assess your plants' drainage needs, identify potential issues, and provide expert solutions to keep your potted paradise thriving.
Protect your investment and enjoy lush, healthy plants without the guesswork. Contact us now for a consultation!
Conclusion
Caring for plants in pots without drainage holes requires a more attentive and proactive approach to watering. By regularly employing the "Lift Test," understanding your plant's signals, and potentially creating a false bottom, you can successfully navigate the challenges and enjoy your beautiful, thriving houseplants for years to come. Remember, consistency and observation are your best tools in preventing the dreaded root rot and ensuring your green companions flourish, even in their chic, hole-less abodes.